Perimetry Practical
|
Check of this article is requested. Suggested reviewer: Carmeljcaruana |
Perimetry Practical[edit | edit source]
Introduction[edit | edit source]
Glaucoma is one of the chief causes of irreversible blindness in the world. In fact more than six million individuals worldwide are affected by glaucoma. Consequently physicians use visual field examinations to detect abnormalities in central and peripheral vision and address medical conditions such as glaucoma and other neurological and ophthalmological deficits.
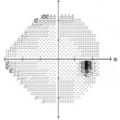
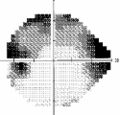
Normal visual field and Visual field with defects
What is Perimetry?[edit | edit source]
Perimetry is a systematic measurement of differential light sensitivity in a visual field. Objects are presented at various places within the visual field while the patient’s gaze is fixed. The two types of procedures in Perimetry are the Goldmann Visual Field examination and the current gold standard for visual testing: Automated Perimtery. THIS PAPER IS ON AUTOMATED PERIMETRY.
Visual Field[edit | edit source]
An individual’s visual field is the entire area that can be seen when the eyes are focused on a single point. For visual field examinations a technique known as Perimetry is adopted.
Importance in clinical medicine[edit | edit source]
Patient using an automated perimeter
Perimetry is a standardized, clinically established method for measuring the visual field. It is therefore of great importance in detecting, diagnosing and managing a variety of eye conditions in ophthalmology.
Perimetry offers the possibility to obtain a comprehensive insight into the function and integrity of the visual system in a short time. In clinics, perimeters are used all day long for screening and observing ocular, retinal and neurological diseases, which are accompanied by a successive deterioration, up to the loss of the visual performance. The machines efficiently evaluate age related macular degeneration, strokes, tumors and optic neuropathies.
The loss of a certain number of axons of the optic nerve lead to areas of reduced eyesight in the visual field, so called Scotomas. Modern computed Perimetry enables ophthalmologists to detect areas of reduced sensitivity. Physicians can associate these defects in the visual field with certain diseases (e.g. Glaucoma), by assessing and interpreting their patterns.
Opthomolgists perform an estimate of five to eight visual fields tests using Perimetry per day and are able to identify areas within the visual fields that need to be closely watched and would not have been picked up clinically. Perimetry, besides Tonometry, Gonioscopy and Ophthalmoscopy is of particular importance in the diagnosis and follow-up of glaucoma. Glaucoma is a slowly progressing disease and is one of the most common causes of blindness worldwide. The number of glaucoma patients is estimated to be 72,9 million in 2020, of which around 11,2 million will go blind ambilateraly, because their disease is not treated in time.
Literature review[edit | edit source]
How does it Work?[edit | edit source]
The working principle of Perimetry can be outlined using the Automated Perimetry procedure as a template. The perimeter is linked to a virtual program on the accompanying computer. The program tests the central 30 degrees of the visual field using a six degree spaced grid. A visual sensitivity map is generated after lights of same size and color but varying intensities are flashed arbitrarily in the patient’s visual field. The intensity of the stimulus is varied by a system of filters that attenuate the stimulus. The patient usually indicates a response by pushing a button whenever light is seen. Thus, allowing the computer to calculate and measure the patient’s visual field identifying areas of vision loss and successfully diagnosing the patient.
Advantages and disadvantages[edit | edit source]
Automated Perimetry is a well-established technique for testing visual fields. This is because it provides the greatest standardization, calibration and statistical analysis of results. (Miller, Walsh, & Hoyt, 2005). The instrument’s high sensitivity and specificity produces detailed and valid data and removes the need for an experienced perimetrist to be present. In Automated Perimetry, results are quantitatively produced in a timely manner allowing for an early objective diagnosis of diseases such as glaucoma. Finally, Automated Perimetry compares the patient's sensitivity to stored values that have been obtained from normal people; in other words, the normative data.
Despite the several advantages of Automated Perimetry there are a few disadvantages that exist. For instance, patients may find it inconvenient due to the prolonged test time. The lack of flexibility in the procedure, such as examining only certain variables is also a major disadvantage of Automated Perimetry. A large majority of the patients that have visual field examination such as Automated Perimetry belong to the age group over fifty. Since there is usually no trained professional, subjects would not be given breaks if they experience fatigue. Subjects would also feel discouraged to respond to the stimuli without the presence of an examiner. Furthermore, patients require a good cognitive function to perform Automated Perimetry this would mean variations in response time for patients belonging to an older age group compared to those belonging to a younger age group. In conclusion it behoves physicians to reflect on the fact that the visual field data produced is only as reliable as the patient’s response.
Risks involved in Automated Perimetry (patients/examiners)[edit | edit source]
The use of an Automated Perimeter is safe. The stimulus projected in the patient visual field produces no harm to the patient.
Ethical Issues[edit | edit source]
There have been no ethical issues reported with the use of Automated Perimetry.
Equipment[edit | edit source]
Automated Perimeter[edit | edit source]
MEDMONT M-700
You will also need a computer with the operating system (Example: MEDMONT STUDIO)
Methodology[edit | edit source]
- Turn both required equipments on.
- Open the operating system Medmont Studio.
- Create a new file for the new patient.
- After completing the patient’s personal data in the file and saving them, start a new examination.
- A new window will open, which represents the perimeter. The small black circles with the blue number inside (to be seen on that new window) are the light points of the test. The blue numbers stand for the starting exposure level, measured in decibels.
- The type of the exam chosen should be the glaucoma test. Determine the perimeters of the measurement. False positives, false negatives and Fluctuation measurement should be chosen as further parameters. The first one may be the most important parameter for determining the patient’s reliability and it measures if the patient is only responding to the rhythm of the light appearance. False negatives show the reliability of the patient towards having really seen that point on the screen. The last parameter ensures more effectiveness of the test, as it re-tests the points where one couldn’t be sure of their reliability. Retest abnormals and Fixation loss are two additional parameters, which retest the patient’s incorrect responses and measure the patient’s reliability on fixating the target.
- Choose one eye (right/left) to start the procedure with and select it then in the Eye menu.
- The non-tested eye should be covered and the patient should sit comfortably and remain concentrated in front of the perimeter screen. Silence should be kept and it is very important to not disturb the patient.
- The patient must keep his eyesight fixated on the target in the middle of the screen.
- Once the patient recognizes the light on the screen an immediate response should be made by pressing the button.
- The examiner sets demonstration mode first, before the actual examination starts, in order for the patient to get used to the response button.
- The actual test only begins after the examiner presses the Start button. During the test it is possible for the examiner to observe the state of the exam on the screen of the computer, as well as the light points being tested in the test. The circles on the screen change their colours according to their current status. BLUE stands for as yet untested, RED for exposed but not seen, GREEN for exposed and seen and WHITE for final completed state.
- At the end of the test, the results regarding fixation losses, false positives or negatives will be displayed on the screen.
- The file should be saved in the operating system.
Data processing
- Open the saved file. The menu on the upper side of the screen, will show you three icons that will give you the options of showing the patient’s information, the test results (eg: as the thumbnail view) and the analysis of the patient’s examination.
- When opening the patient’s information on the left side, one is given many options of viewing the results by clicking on View Mode. Combination view sets four different view types of the same exam. The button enables a more detailed view of the results.
- Leads to the window of display setting, where particular view should be chosen.
- One should then choose the four view types: the first should be set as Plan , the second as Perspective , the third as Numeric , and finally the fourth also as Plan , however in grey scale.
- For all views Non-linear Scaling should be selected and for the first view Section should be checked. In the first and in the second views it is important to select Level. Also relevant for the second are the selection boxes of Hill of vision, Attributes and Statistics. In the third view Age normal deviation should be selected.
- The resulting views can be displayed as a printing preview and then printed to be attached to the results of the examination.
Conclusion[edit | edit source]
Automated Perimetry has evolved exponentially over recent years due to modern computer technology that enables more complex visual stimuli and advanced test procedures opposed to the traditional methods of testing. (McKendrick, 2005). Automated Perimetry characterizes and monitors a range of optical diseases such as glaucoma, thus aiding treatment and improving management of these diseases. Advances and developments in this visual field procedure can be accomplished if they adhere to multicentre trials that yield clinical significance. For instance, the possibility exists of developing objective perimetry. This entails using evoked potential testing, an analysis of brain waves, to do objective visual fields. Developments to even perform a full threshold test in less than a minute are also trying to be accomplished. It would mean the patient would just have to look at the stimulus and the instrument would detect its response. In conclusion, physicians are trying to develop the perfect test to identify what is wrong, how long it has been there and what should be done to treat it. Until then, Automated Perimetry is the most reliable of visual field examinations that can aid patients that have or could develop ocular diseases.
References[edit | edit source]
- Quigley, Broman; „Thenumber of people with glaucoma worldwide in 2010 and 2020“;
Br J Ophthalmol., March 2016; available from: https://www.ncbi.nlm.nih.gov/pubmed/16488940
- Miller, N. R., Walsh, F. B., & Hoyt, W. F. (2005). Walsh and Hoyt’s clinical Neuro-ophthalmology, volume 1. Retrieved from https://books.google.cz/books?isbn=0781748119
- McKendrick, A.M. (2005) ‘Recent developments in perimetry: Test stimuli and procedures’, Clinical and Experimental Optometry, 88(2), pp. 73–80. doi: 10.1111/j.1444-0938.2005.tb06671.x.
- Visual field (2016) Available at: https://medlineplus.gov/ency/article/003879.html (Accessed: 25 December 2016).
- Montolio, F.J.G., Wesselink, C., Gordijn, M., Centre, Sciences, L., Netherlands, T., Jansonius, N.M. and Center, E.M. (2012) ‘Factors that influence standard automated Perimetry test results in glaucoma: Test reliability, technician experience, time of day, and season’, Investigative Ophthalmology & Visual Science, 53(11), pp. 7010–7017. doi: 10.1167/iovs.12-10268
- McKendrick, A.M., 2005. Recent developments in perimetry: test stimuli and procedures. Clin. Exp. Optom. 88, 73–80. doi:10.1111/j.1444-0938.2005.tb06671.x
- Healio (no date) Available at: http://www.healio.com/optometry/glaucoma/news/print/primary-care-optometry-news/%7B48a9063c-2573-4b54-807e-1236ab4af025%7D/as-perimetry-options-improve-visual-field-testing-grows-in-importance-beyond-glaucoma (Accessed: 25 December 2016).


